Everyday Sass Tools
From March 13, 2022
I use Sass’s CLI a lot and wanted to drop some useful notes.
Read This Article
June 11, 2022
Performance
Tips and Tricks
Web Development
Lighthouse is a website testing tool that spits out some numbers that indicate a website’s performance, accessibility, SEO, and how well it follows best practices. It’s a great tool that has become an industry standard. So much so that it often plays in to key performance indicators (KPIs). I use it daily at my job, and wanted to automate the process.
In this article, we’ll review Lighthouse and how to use it. We’ll talk about the Lighthouse Command Line Interface (CLI) and demo some configurations, then we’ll learn how to run Lighthouse from a Bash script. From there, we’ll discuss launch agents and daemons, how they’re set up, and how to tell your computer to run them using Launchd.
Lighthouse is an open-source, automated tool for improving the quality of webpages. Developed by Google, it can run audits on websites for performance, accessibility, SEO, and adherence to best practices for websites & progressive web apps. Lighthouse can be used on multiple platforms, including right inside Chrome DevTools, from the command line, as a Node module, and even as part of a continuous integration flow.
To run a Lighthouse audit, a user passes a URL to audit. Then, Lighthouse runs a series of checks against the page and generates a report detailing how well the page did. From there, developers can use the failing audits as indicators of how to improve the page.
When I use Lighthouse on the fly, I tend to use it in the DevTools. Chrome is my daily browser, so it’s pretty convenient to just pull up. Even more convenient is using the CLI to run the audit and save it as a file to my computer.
CLI is an initialism for Command Line Interface. It’s basically a way to run a program from the command line, setting options and passing values using text in a predetermined format. The Lighthouse CLI is free for download and runs on Node.js (if you don’t have Node, follow these installation instructions).
npm install -g lighthouseOnce installed, an audit can be run just by passing a URL to the lighthouse command.
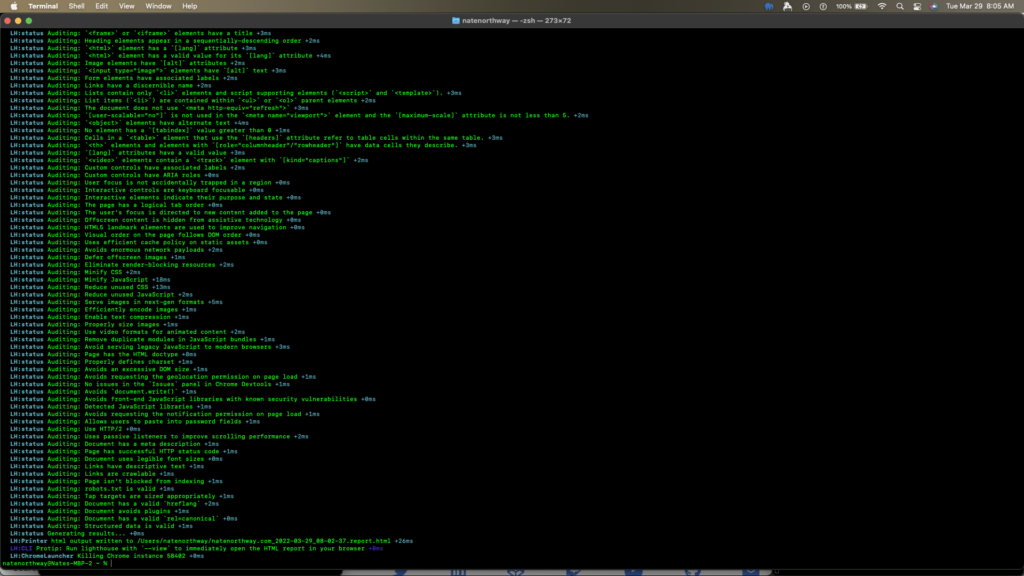
lighthouse https://natenorthway.com/You’ll see a Chrome window pop up and your Terminal window will be flooded with Text. You’ll see the site you ran Lighthouse on pull up in the Chrome window, and text will still be flowing in the Terminal screen. When it’s done, the Chrome window will automatically close and the Terminal window will read where the report was saved.
The generated report looks just like a Lighthouse report ran in the browser, but it’s a full HTML file. I put that file on my server so you can see what it looks like if you’re unfamiliar (actually I’m just proud of that 100 performance score :D).
The CLI has a lot of configuration options, which are all detailed on the GitHub page. I’m going to review the ones that are most useful to me and that we’ll be using throughout the rest of this article.
Quiet Mode
Quiet Mode keeps the wall of text from flooding the Terminal screen. This will be useful when we automate Lighthouse because nobody is going to read it. It’s also nice if you plan to view the output right away. To use it, pass the flag --quiet to your Lighthouse command.
lighthouse https://natenorthway.com/ --quietOutput Path
The output path can be set to save the report in a specific place with a specific name. Add the flag --output-path and pass it a valid file path or stdout to write to stdout. Make sure to specify a file name, otherwise the file will not save.
lighthouse https://natenorthway.com/ --output-path /Users/natenorthway/audits/results.htmlView
Add the view flag to open the HTML report in your browser immediately.
lighthouse https://natenorthway.com/ --viewDesktop or Mobile
Lighthouse automatically runs audits using an emulated mobile device. To run it from a desktop browser, just add the --preset=desktop flag.
lighthouse https://natenorthway.com/ --preset=desktopFor my purposes, I like to run Lighthouse in quiet mode, output a report to a directory on my desktop that is viewed right away, and sometimes, I want a desktop view. All that in one command is pretty straightforward.
lighthouse https://natenorthway.com --output-path /Users/natenorthway/audits/report.html --quiet --viewThat command can even be saved to a file. I’ll save it to a file called audit.sh in the same directory I output the last report to (/Users/natenorthway/audits). Here’s the content of that file – note the first line, which looks like a comment, but it’s actually an indicator that points to the interpreter to use. If we execute this script in Terminal without that line, it’ll run just fine, because it’s already using zsh. However, when we want to automate this, the script won’t be running in a terminal window, so we have to explicitly state the interpreter to use.
#!/bin/zsh
lighthouse https://natenorthway.com --output-path /Users/natenorthway/audits/report.html --quiet --view
That’s in a script named audit.sh, which we can run in terminal by calling bash </path/to/script-filename>
bash /Users/natenorthway/audits/audit.shSo, we’ve got a script that executes a call to Lighthouse. Very neat. And I don’t mean that sarcastically – when I first got this running I was pretty excited. But wouldn’t it be great if we could, oh, I don’t know, get that script to run automatically? I think it would be! Let’s do it!
To automate running Bash scripts, we can use Launchd, which is a process used by macOS to manage launch daemons and launch agents. During system startup, launchd is the first process the kernel runs to set up the computer.
Launch daemons and launch agents are different types of daemons. Daemons are programs that run as a background process – they don’t require user input and they are managed by the operating system. The difference between a daemon and an agent is that daemons are run by the system and are independent of user sessions. Typical programs that a launch daemon would run could include repetitive maintenance tasks that run on a schedule. Launch agents, while they are very similar to launch daemons, execute the tasks within the context of a user’s interactive session.
Both of these script management tools are daemons, but the level at which they run is an important distinction to be made, especially in this case. When we’re running Lighthouse, we’ll need a browser window to use, which won’t be available at the system level. Because of that, we need to set up our daemon as a Launch Agent.
There are a number of things to do to set up a launch agent. First, we’ll have to author the file that defines the agent, known as a plist – it’s not that hard, just an xml-style file that sets definitions.
Next, we’ll have to make sure that our bash script and error log have the right permissions to allow the agent to output to them.
Next, we’ll use the launchctl utility in the command line to interface with Launchd, which will manage the agent.
Finally, we’ll let the computer just…do it’s job and compute!
The plist file is stored in one of two places. The plist files for Launch Daemons, which run from the root user, are stored at ~/Library/LaunchDaemons. Launch agents that also run on behalf of the root are stored at ~/Library/LaunchAgents. We didn’t go in to too much detail about the differences between root-level launch agents and daemons. Launch agents on the root level run on behalf of a program, while root level launch daemons run independent of a program (but may be tied to a program).
For Launch Agents, which run in the User’s session, the plist files are stored at ~/Users/[username]/Library/LaunchAgents. There should not be any launch daemons running at the user level.
The file name will have an unusual naming convention, known as Reverse Domain Name Notation, which is intended to eliminate namespace collisions because any domain name is unique. The name of our plist file will be com.audit.daemon.plist, because it will be the plist for the daemon that runs the audit program.
The file starts with an XML definition that specifies the version & encoding. Then, the doctype (plist) is declared with attributes that determine the version & where the document type definition (.dtd) file can be found. The first two lines can be copied and pasted, as every plist starts with them.
<?xml version='1.0' encoding='UTF-8'?>
<!DOCTYPE plist PUBLIC "=//Apple//DTD PLIST 1.0//EN" "http://www.apple.com/DTDs/PropertyList-1.0.dtd">
Next, we’ll open the <plist> tag, with the attribute verion="1.0". We’ll also open the <dict> tag. Let’s close those up right away, too.
<plist version="1.0">
  <dict>
  </dict>
</plist>
Now, we need to define some properties, which are identified with the <key> tag, which is followed immediately by the element that sets the key’s value. To set the value of the key, we can use a number of XML elements, depending on the value’s type. See the table below for a whole explanation of the different types and what they mean.
| Element | Description | Notes |
|---|---|---|
| array | A collection of other elements. Can be any of the other valid elements. | Key/value pairs should be under a parent <dict> element |
| string | Text | |
| data | Contents interpreted as Base-64 encoded | |
| date | ISO 8601 (or subset) date string | Smaller units may be omitted with a loss of precision |
| Boolean true | Written as <true/> | |
| Boolean false | Written as <false> | |
| real | A floating point number | Pattern should match: (“+” | “-“)? d+ (“.”d*)? (“E” (“+” | “-“) d+)? where d is a digit 0-9 |
| integer | Base 10 integer | Can be signed or unsigned |
Woah, that was a lot of set up to talk about what we actually have to do, which is relatively minimal. We need to define the daemon by using the label key. Then, we’ll set the program key, which is where the script is located. We’ll have to pass some information to the shell, too. We need to pass the ProgramArguments key to tell the shell where the Lighthouse script is located. We’ll also have to set up enviornment variables, just in case the shell version we’re using might be in another location. Then, we’ll set the directory the daemon runs in using the WorkingDirectory key. Then, we’ll define the StandardErrorPath key, which will be the path to the log file. We won’t need a StandardOutPath, because we’ll be setting Lighthouse to run in quiet mode, but if we expected any direct output from the console, we could use that key to set it. Next, we’ll set the RunAtLoad key, which is a boolean. Finally, we’ll set the SetCalendarInterval key, which will be set with a dict list containing an hour key that is set with an integer element.
Whew. Here is the final file.
<dict>
  <!--Name of the Daemon-->
  <key>Label</key>
  <string>com.audits.daemon.plist</string>

  <!--Name of the program to run-->
  <key>Program</key>
  <string>/Users/natenorthway/audits/audit.sh</string>

  <!--Location of Lighthouse-->
  <key>ProgramArguments</key>
  <array>
    <string>/usr/local/bin/lighthouse</string>
    <string>/Users/natenorthway/audits/audit.sh</string>
  </array>

  <!--Variable shell locations-->
  <key>EnvironmentVariables</key>
  <dict>
    <key>PATH</key>
    <string>
      <![CDATA[/usr/local/bin:usr/local/sbin:/usr/bin:/bin:/usr/sbin:/sbin]]>
    </string>
  </dict>

  <!--The directory being worked in-->
  <key>WorkingDirectory</key>
  <string>/Users/natenorthway/audits</string>

  <!--The log file for errors-->
  <key>StandardErrorPath</key>
  <string>/Users/natenorthway/audits/stderr.log</string>

  <!--Run when loaded (bootstrapped)-->
  <key>RunAtLoad</key>
  <true />

  <!--Run every occurrence of 0:00 (midnight)-->
  <key>StartCalendarInterval</key>
  <dict>
    <key>Hour</key>
    <integer>0</integer>
  </dict>
</dict>The shell script needs to be an executable file in order for the daemon to run it. To do that, the chmod command can be used. Navigate to the directory the script is in, then pass the filename to the chmod command. The script below can be copied & pasted in to terminal, assuming you’re in the right directory and the script name is “audit.sh”, as it is on my machine.
chmod +x audit.shNow, you should be able to run the file by calling bash audit.sh.
launchctllaunchctl is the command-line tool that interfaces with launchd to automatically run tasks. A lot more can be learned at the Apple Support article on Launchd. We’ll be using launchctl to tell launchd to load (bootstrap) the launch agent on behalf of your user. We’ll start by figuring out what the user ID is in the system, then tell launchctl to add it to launchd. We can also use launchctl to run, stop, and remove the launch agent from launchctl.
If you’re not into using the command line, there is a GUI available from Soma, but some of the features that are critical are paid.
Let’s start by figuring out our user ID, which we’ll need to supply to the bootstrap command in order to associate the daemon with a user. This code can be copy/pasted – just be sure to note the returned value. You can save it as a variable, just remember that the variable will only be valid for the current session.
id -uFor me, that returned 501, and not the HTTP error 501 (sorry I make bad jokes). That’s the number that will be provided to the launchctl commands we’ll run. If you plan to copy/paste any of the launchctl commands, remember to replace the user ID that follows gui/ with your user ID, and the username after /Users/ in the filepath with your username.
launchctl bootstrap gui/501 /Users/natenorthway/Library/LaunchAgents/com.audits.daemon.plistIf everything was done correctly, Lighthouse should run, saving a report to the file path specified! If it didn’t work, we can make changes and figure out why. Say we made a typo in the filepath and Lighthouse doesn’t save a file. Fix the typo, then return to the console window and remove the daemon using bootout, then bootstrap it again.
#remove the daemon from launchd
launchctl bootout gui/501 /Users/natenorthway/Library/LaunchAgents/com.audits.daemon.plist

#add the daemon in to launchd
launchctl bootstrap gui/501 /Users/natenorthway/Library/LaunchAgents/com.audits.daemon.plist
If you’re not sure if a daemon was successfully loaded, you can list the daemons. It’s a long list that launchctl will provide, so you can narrow results to just your daemon by piping the results to grep, or, output a message if it doesn’t exist.
launchctl list | grep com.audits.daemon.plist || echo "not found"

#if it exists, the ouput should be
-   0   com.audits.daemon.plist

#if it doesn't exit, the output should be
not found
A daemon can be run outside of it’s routine, too, by using launchctl start. It can be stopped with the stop command. Unlike bootstrap and bootout, you only need to list the daemon’s label, not the entire filepath.
#start
launchctl start com.audits.daemon.plist

#stop
launchctl stop com.audits.daemon.plistYou’ll want to set up your bash script & logs in a folder that doesn’t require extra permissions, such as your user folder. That’s where I set up my folder. Mac has some…weird hang-ups about letting daemons access items in the desktop, downloads, and documents folders, and, though there is a way around that, just not using those folders is easiest. Plus, it’s one less directory to type up.
I know I suggested that everything could be done without the Launch Control app that I linked to, but it really is helpful, even without the paid version. It can help with configuration issues.
Take everything in this article with a small grain of salt – this is what worked on my version of MacOS (MacOS Monterey) on my computer (2021 MBP M1) and your system’s configuration might change some things (including but not limited to: your shell, what version of launchctl is installed, where things get installed, and so much more).
This is really cool and I had a lot of fun building it. What else can be done with these tools? Well… how about I just list off some ideas?
So expect this to be but the first post in this series!
I did a whole lot of googling and reading to figure this stuff out. All in all, it took me about 2 weeks to learn about everything and get a working prototype, then another 2 weeks to write this article between my clients & job. I have so many tabs open that I’m going to, in a very oddly satisfying way, close up now as I list them here.
From March 13, 2022
I use Sass’s CLI a lot and wanted to drop some useful notes.
Read This ArticleFrom June 13, 2022
I wanted to build a project and learn a new library. I used an idea from a Reddit post to learn React.
Read This Article
No Comments...yet